Introduction: Your Rig Isn’t Dead — It’s Just Evolving
So, your mining rig is sitting there. The fans still hum. The lights still glow. But after the Ethereum Merge, your GPU rewards disappeared, electric bills skyrocketed, and profitability went from maybe to no way. Now you’re asking yourself: What the hell do I do with this expensive piece of tech?
You’re not alone.
Thousands of at-home miners are staring at once-profitable rigs gathering dust. The good news? You don’t need to dump your gear on eBay just yet. Instead, you can transform your mining rig into a powerful, flexible home server — and start using it for something even more valuable than coins.
In this guide, we’ll show you exactly how to go from hashes to hosting. You’ll learn how to repurpose your mining hardware into a media center, cloud server, or even a private app host — and we’ll walk you through every step.
Can a Mining Rig Be Used as a Home Server?
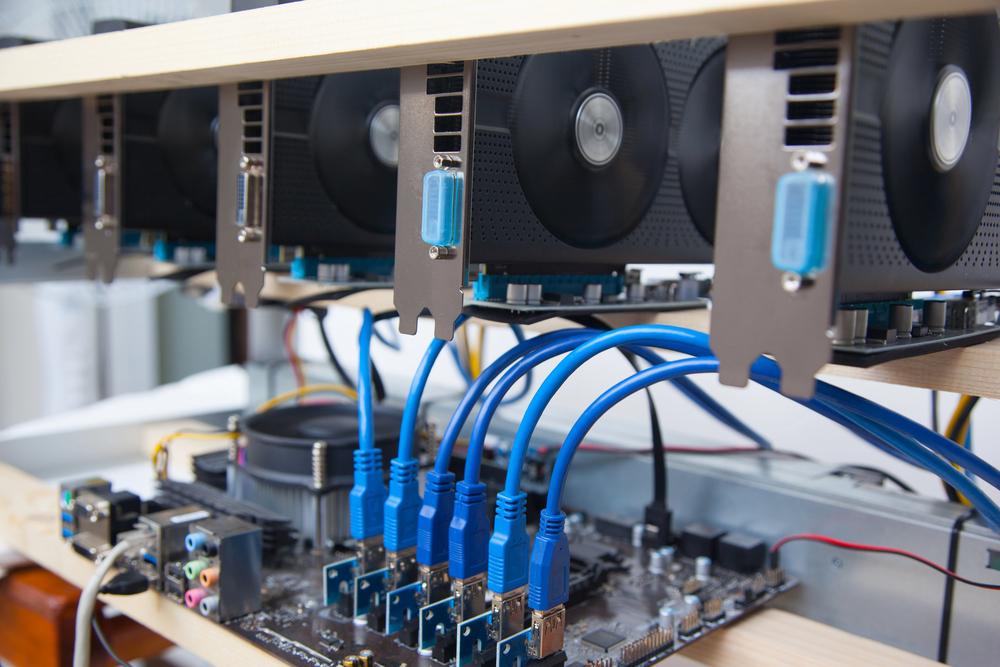
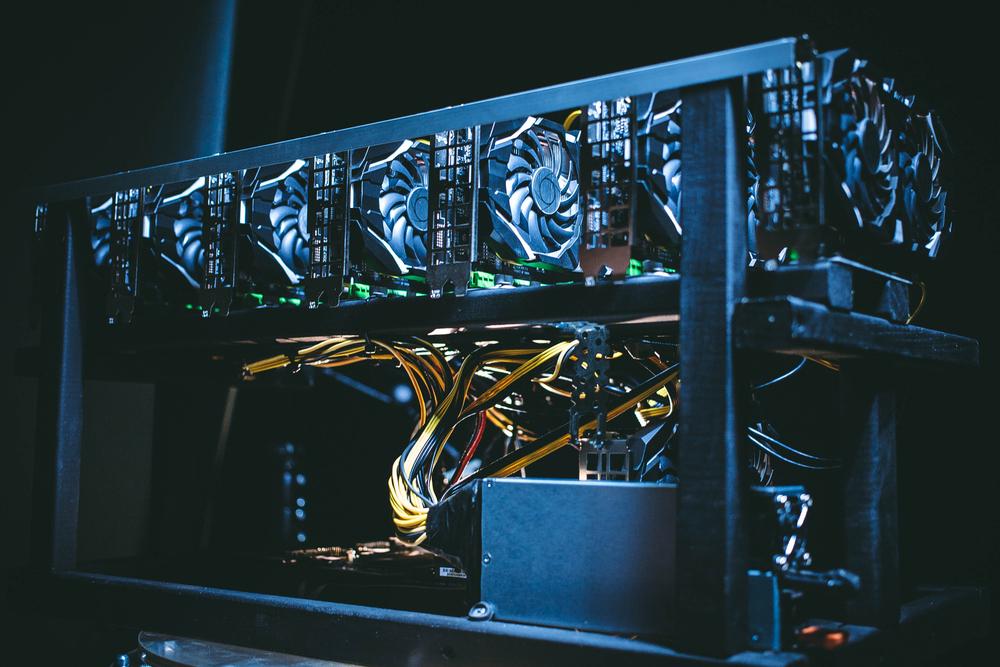
Absolutely — and in most cases, it’s overqualified. Mining rigs are basically custom-built, high-performance PCs. They’re equipped with multiple GPUs, decent CPUs, lots of RAM, and plenty of PCIe lanes for expansion. That’s a dream setup for tasks like file hosting, media streaming, or even web servers.
💡 Quick Comparison: Mining Rig vs Home Server
| Component | Mining Rig | Home Server Requirements |
|---|---|---|
| CPU | Mid-range, often underutilized | Important for multitasking |
| RAM | 8–32GB (depending on mining setup) | 8GB minimum, 16GB ideal |
| GPU | 1–6 GPUs, high power draw | Often unused (unless gaming) |
| Storage | Usually minimal SSD for OS | Needs more storage for hosting |
| Cooling | Built for 24/7 operation | A big plus for long uptime |
Choose Your Server Type: What Do You Want It To Do?
Before you dive into installation, decide how you want to use your server. Here are popular options:
-
Media Server (Plex / Jellyfin)
Stream your movies, TV shows, and music to any device in your home.
-
File Server / NAS (Network Attached Storage)
Create a central hub for documents, backups, and personal data.
-
Game Server
Run private Minecraft, Valheim, or Counter-Strike servers with friends.
-
Cloud Apps (Nextcloud, Home Assistant, Pi-hole)
Host your own Google Drive alternative, automate your home, or block ads across your entire network.
💡 Tip: You can combine these roles using Docker or virtualization.
Step-by-Step: How to Convert a Mining Rig into a Home Server
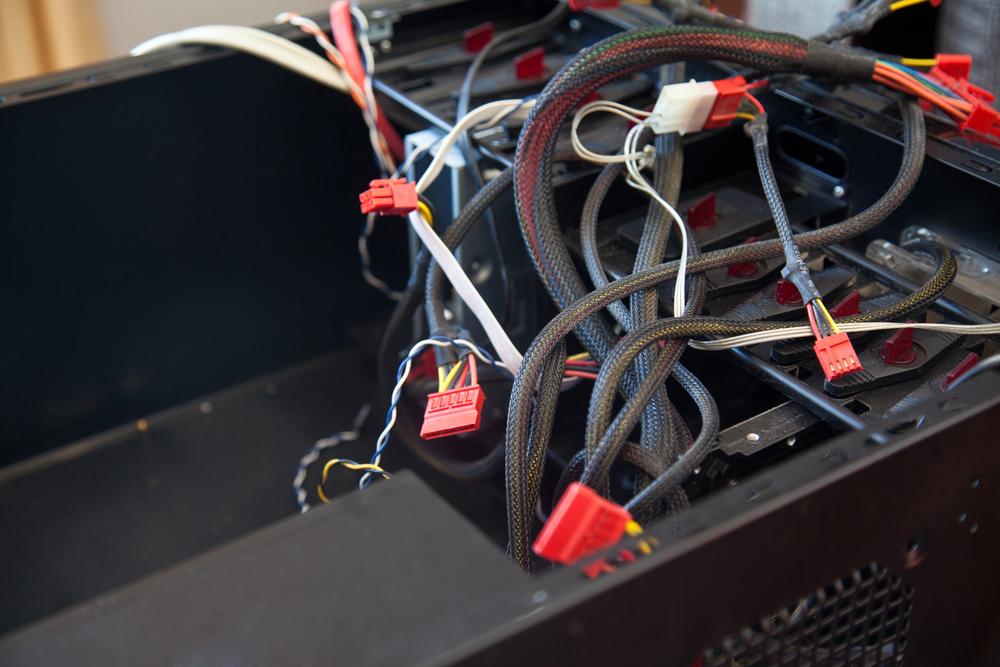
Step 1: Clean It Up & Prep the Hardware
-
Remove unnecessary GPUs if they won’t be used
-
Replace thermal paste and clean dust filters
-
Install extra storage drives (HDD/SSD) if needed

Annotated photo showing rig cleanup and SATA cable installs
Step 2: Choose & Install a Server OS
-
Recommended options:
-
🐧 Ubuntu Server – great for flexibility
-
🧱 TrueNAS – best for storage-heavy setups
-
🎛 UnRAID – user-friendly, supports Docker apps
-
-
Boot from USB stick, use BIOS to prioritize boot order
Step 3: Configure the Network
-
Set a static IP for easier access
-
Enable SSH for remote control
-
Optional: Install a remote access tool like Tailscale
Step 4: Install Your Apps or Containers
Use:
-
Plex/Jellyfin for media
-
Nextcloud for personal cloud
-
Samba for file sharing
-
Pi-hole for ad blocking
💡 Want all-in-one? Try CasaOS
Step 5: Optimize for 24/7 Operation
-
Underclock the GPU or remove it entirely
-
Enable fan curve profiles for quiet operation
-
Consider replacing high-wattage PSUs with more efficient ones
What You Can Host at Home (Examples From Real Users)
-
A 4TB Plex server for movies and TV
-
A Nextcloud setup that replaces Google Drive
-
Private Minecraft servers for kids or communities
-
A personal Git server for developers
-
Security camera feeds for home surveillance
💬 Redditor r/selfhosted says: “I turned my RTX 3080 mining rig into a Jellyfin + NAS monster. Haven’t paid for a streaming service in months.”
What You Shouldn’t Do
Not every idea is a good fit. Avoid:
-
Hosting critical websites on residential internet
-
Expecting commercial performance
-
Skipping backups — always mirror important data
🛑 Security Tip: Always keep your server behind a firewall/router, and keep software updated.
Conclusion: A New Purpose for Old Hardware
Just because GPU mining is on life support doesn’t mean your rig has to be. Repurposing your mining setup into a home server is a smart, future-proof move that:
- Saves money
- Reduces waste
- Teaches valuable tech skills
- Gives your hardware a second life